Tuesday, August 5, 2008

Chicken Stock

I admit it up front, this was a first for me. I've never made any kind of stock before. I'm a stock virgin. There seems to be a rising consensus that making your own stock is one of the biggest things a home cook can do for the quality of their food. Add that to the fact that there wasn't much left to make that in the entire book that doesn't require some kind of stock or broth, and it was time to get cooking.

I had been saving chicken carcasses from roast- and beer can-chickens for quite awhile. Ever make a mistake before you've even started cooking? I have. Make sure you clean the bones well before you freeze them. Frozen meat remnants are awfully hard to remove from bones when they are, um, frozen. And if that's not enough reason (it should be, it cost me an hour), you'll really have no idea how many bones you actually have when they're covered in meat. This cost me another hour and a trip to the grocery store for some supplemental bones. Once I had the proper quantity of bones, they all went into my brand spanking new stock pot:


From this point on, things are not exactly difficult, but they are somewhat tedious. If there is one standard theme across the entire book, it's that all impurities should be removed at every possible step. Stock is the perfect example of this; it requires a LOT of skimming. It's probably a good thing though, because a lot of junk that didn't exactly look appetizing rose to the top throughout the process.

Anyway, continuing on, the first step is to cover the bones in cold water. It's important to use cold water as the slow temperature changes are just as important as the actual heating to the development of flavors.


I brought the bones and water up to a simmer very slowly, skimming every few minutes the entire time. It took about 75 minutes to go from cold water and half frozen bones to simmering. Once the water was simmering I dumped in about four pounds of ice to shock the stock. Say that five times fast.


There was quite a large mass of water and bones that were very hot, so the ice melted pretty quickly. In the mean time though, it was remarkably easy to skim off a bunch of fat and some more impurities. With a good portion of the scum scraped off the top, I felt like I could carry on even given the warning that it would be hard to continue skimming once the vegetables were in the pot. What vegetables? These ones:


It's just some giant leeks, giant onions, and giant carrots. Seriously, look at the last picture. They're as big as the stock pot. I stuffed them into the pot and continued to heat the stock and simmer it for another 40 minutes.


So the vegetables weren't really that big. Sue me. Here's another shot of the simmering stock, and it gives a pretty good look at some of the junk that was continually rising to the top.


After that had simmered for 40 minutes, I removed it from the heat and let the stock settle for about ten or fifteen minutes. I then needed to shock it and cool it very quickly. You may remember from a just a few paragraphs ago that I need to go out and buy a stock pot to make this. It shouldn't be a long bridge to cross then to figure out that I didn't have another pot that big, and certainly not two that would suffice for an ice bath. Thankfully I'd planned ahead and made sure the kitchen sink wasn't stocked full of dirty dishes. Get it? Stocked?

I set my dutch oven in a sinkful of cold water filled with every bit of ice in the house. It looked only mildly ridiculous:


Some of the ice had melted at this point, but you get the idea. I, with some assistance, strained the stock into the dutch oven. This was not just a pour and strain situation though. I carefully ladled out scoop after scoop of sauce in an attempt to take as little of the settled junk as possible. It turns out it takes about fifty ladles to ladle out the full amount of stock.

It just barely fit in, which was the first signal that maybe the stock was a little light. I have a six quart dutch oven, and the recipe was only suppose to make 4 quarts. This picture gives a pretty good idea of the amount of fat that was still kind of floating on the surface. There wasn't a whole lot I could do about it. I tried for a little longer to skim off whatever I could.


And here's the remnants from the pan:


There was a lot of junk settled in the bottom that you can't see in the picture, so I'm glad I was careful when ladling the stock into the ice bath. I let it cool, stirring it occasionally until it was completely cool, and then separated it into ziploc bags for long term storage in the freezer.

It made about five and half quarts total, so that should last me many months. It tasted good, if not a little light. I guess that's to be expected though, since the opening words of the recipe are "This is a very light chicken stock." The one thing this stock certainly was not is salty like those store bought broths and stocks. That will be a welcome bonus for sure. Now we just wait for a chance to use all of this...

Tuesday, July 29, 2008

Chilled Salad of Haricots Verts and Tomatoes

This dish was a small part of what was undoubtedly the best eating week of my life. It occurred on my honeymoon last October and included meals at The French Laundry, Bouchon, and several other Napa and Sonoma area restaurants. My wife ordered it as an appetizer and it every bit was worth it. All that said, it's not the reason I chose to make this dish. I'm wayyyyy to practical for that kind of reasoning. The last post on basil puree goes into the real reason behind making this dish (I had a lot of basil), so I'll skip that part here. Or did I just tell you? Go read the basil post anyway.

By no means have I made a large percentage of the Bouchon recipes yet, but patterns are certainly emerging. One of them is the use of vinaigrette with vegetables. Another is the pairing of hard-boiled eggs and vegetables. Another is the use of a lot of fresh herbs. Just check out the asparagus post if you don't believe me. All of these were in play for this salad.

The ingredients list for this salad is pretty long, especially for something in which he description starts off with 'This is a pretty straightforward salad..." Here's the full list: haricots verts, red onion, fennel, salt and pepper, Pernod, olive oil, tomatoes, eggs, olives, anchovy, basil puree, vinaigrette, shallots, chives, tarragon, chervil, and parsley. I cut a few corners and ended up with what you see below:

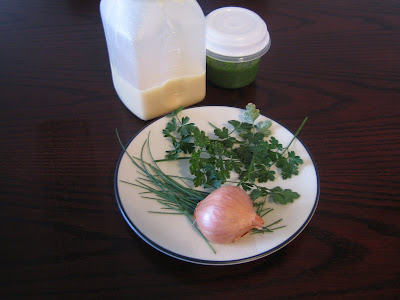
That would be fennel, hard-boiled eggs, heirloom tomatoes, red onion, and green beans for the 'meat' of the salad. Add to that the vinaigrette, basil puree, shallots, parsley, and chives for the dressing.

That means that I left out five ingredients. Try and figure it out? Get it? No? You didn't try? Fine. I left out the Pernod (hate the taste), olives (hate the taste), anchovy (totally forgot them at the store), tarragon and chervil (too cheap). Now that we have that all ironed out, let's do a little cooking and a bunch of assembling.

The first step was to blanch the green beans. I boiled a large pot of water and dumped a bunch of salt into it, because "it should taste like the sea" according to Sir Keller. In went the green beans for about four or five minutes, after which I drained them and transferred them to an ice bath. After another draining I laid them out onto paper towels to dry them further. Finally convinced that they were dry, I put them into the fridge to chill for awhile.

Next up was the chopping of the red onion into thin slices. I made sure that all of the pieces were cleanly separated and put those into the refrigerator as well. The fennel required a tad bit more careful dissection, and I wish I had taken some pictures of it because it was the first time I'd ever cooked with fennel. Gotta save the memories forever! I almost left it out for the same reasons I left out the Pernod, but it really wasn't too strong of a flavor in the final dish so I'm glad I didn't. Anyway, I cut the bulb of the fennel in half and removed what was obviously an inedible core and then sliced it into slices just like the onion. I tossed the fennel with some salt and olive oil (this is where the Pernod would of come in) and that joined the beans and the onion in the fridge.

Last up for a trip to the refrigerator were the tomatoes. I purchased two nice looking heirloom tomatoes, one red and one yellow, and sliced them fairly thinly. They got sprinkled with some salt and pepper and drizzled with olive oil. Guess what's next? That's right, into the fridge they went.

Ok, now it's time to end this lack of pictures and start assembling the salad. The bottom layer of the salad was the tomatoes. They're not the prettiest slices you've ever seen, but I promise you that they taste exactly the same as even the most perfect slices you've ever laid your eyes on. I seasoned them with a bit more salt and pepper.


Meanwhile, I tossed all of the dressing ingredients that I was using with the beans until they were well coated and then mixed that with the onion and fennel. All of that got mounded on top of the tomatoes. I'm using mounded loosely here, since it pretty much just collapsed into a single layer.


The final garnish was to add hard-boiled egg quarters. This is where the anchovy and olives would have come in as well, but I skipped that part.


And there you have it. It was very good and highlighted the concepts that Bouchon does best. That is, it lets the fresh vegetables speak for themselves but still adds additional flavor through the dressing and extra texture with the eggs. All that being said, you could take this salad down just a notch and have something that would be 95% as good and take 30% of the time. I would consider trading the basil puree for a little fresh basil next time, and also probably leave out the fennel. Those two changes alone would make the dish extraordinarily easy, quick, cheap, and still extremely good. I'm learning quickly that it's really kind of hard to mess up fresh, in season vegetables. This one is a keeper.