Monday, October 27, 2008

Pastry Cream

Welcome back to me. I haven't posted anything in a few weeks, even though I have made a few dishes. That's mostly due to the fact that we bought a condo, which keeps you mind-bogglingly busy. The peak of that seems to have passed, so hopefully I can get caught up in the next couple of weeks.

Pastry cream is just one of the ingredients in Sweet Crepes with Peaches and Pastry Cream, but it requires some preparation that is detailed in the recipe for a strawberry tart. . That fact earns the pastry cream its own post.

It's a pretty simple concoction, consisting of only milk, sugar, vanilla bean, cornstarch, butter, Grand Marnier, and eggs. Take out just a couple of things and you essentially have an ice cream base. It's neat to see how similar recipes yield completely different foods.


I started out by combining some of the milk, some of the sugar, and the vanilla bean into a saucepan and bringing it all to a simmer.


While the milk mixture was coming to a simmer, I combined the rest of the milk and the cornstarch in a small bowl.


Now that the cornstarch was sitting around getting happy, I whisked the eggs and remaining sugar in a bowl, resulting in this anti-climatic mixture:


Even more anti-climatic-ly, I mixed the cornstarch mixture into the egg mixture, which I'm sure you can guess looked exactly like an egg mixture mixed with a milk mixture:


The milk had come to a simmer, so I tempered the egg mixture by pouring a bit of the hot milk mixture into the egg mixture. When I was convinced the egg mixture was sufficiently warm to avoid turning it all into scrambled eggs, I dumped the egg mixture into the saucepan of simmering milk:


I cooked the mixture over medium heat. Under caution from the book, I continuously stirred it waiting for the mixture to thicken and become "lumpy". It started to thicken at about the same time that my arm was beginning to get tired:

My arm was numb around the time it started to become lumpy. It was like stirring some well-set cement:


That was it for the cooking portion. I took the cream off the heat and continue to whisk the crap out of it to remove all of the remaining lumps. After it had been off the heat for a couple of minutes, I added in the butter and Grand Marnier. Immediately after that I spread the cream out into a baking dish and covered it with plastic wrap. As far as I can tell, this is to avoid the formation of a skin on the top of cream. We all know the skin that forms on some foods when left out too long, and it's gross, so I had no intentions of dealing with it here:


Now that the cream was wrapped about four times tighter than it needed to be, it went into the refrigerator. I would use the cream in the crepe recipe the next night.

Without spilling the beans on the crepe recipe, I'll just say that the cream had pretty great flavor. The texture wasn't my favorite however. It wasn't really creamy, but more like a gel. It did something that resembled melting in the crepe, which helped, but it was still just an odd texture for me. It was the perfect complement taste-wise, balancing the lightness of the crepe and the peaches, and I don't think the crepes would of been the same without the cream.

Sunday, October 5, 2008

Brioche

I was supposed to make brioche for the Croque Madame I made long ago, but I was too lazy then. Instead, I linked to The French Laundry at Home and used some store bought bread. I finally got around to making the brioche about a month ago, and now I'm finally getting around to writing about it. Finally.

We'll just jump right in here with the ingredients. You'll see it's pretty tough to mess something up with ingredients like this:


It's a pretty simple list, in absolutely astounding proportions. There's eggs, cake flour, AP flour, sugar, salt, yeast and butter. That would be about five sticks of butter. For two loaves of bread. For comparisons sake, one of the loaves was about the size of a pound of butter. That means that the bread was about half butter. Seriously.

I started by blooming the yeast in some warm water. After a few minutes it looked absolutely gross:


And after ten minutes plus a good stirring it looked a little like a melted Starbucks Frappucino:


During those ten minutes, I sifted together close to equal amounts of cake and all-purpose flour, as well as the sugar and salt. That all went into the bowl of my mixer along with six eggs. I beat it with the dough hook for about a minute:


In went the yeast mixture, followed by another five minute pummeling of the dough:


Now it was time for all of the butter. As you can see in the picture above, I had cut it into slices that were a little less than a tablespoon each. I added about a quarter of the butter at a time, allowing all of the butter to be incorporated before moving on to the next batch. After all of the butter was mixed in, I allowed the mixer to have its way with the dough for ten more minutes. What came out after those ten minutes was pretty disgusting. It was kind of a slimy, greasy mess:


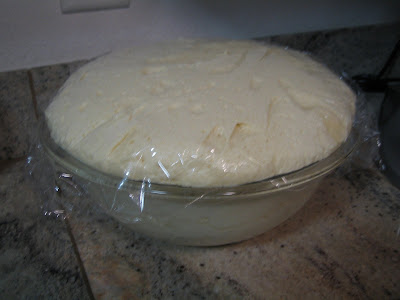
I lightly floured a glass bowl and dumped the dough in. After covering it with plastic wrap it took a little trip to a warm place (a corner of kitchen counter) for a three hour nap:


The dough woke from its little nap having put on a little weight:


I took care of of that problem by removing all of the excess air:


I was surprised at this point that the dough was still so runny and moist, for some reason I had expected it to dry out a little bit. I'm not sure why I thought that, but I did. The dough took another trip, this time to the refrigerator for a night's long rest.

I buttered a couple of bread pans in preparation for baking the bread. You know, just in case there wasn't enough butter in the dough to prevent sticking:


Out came the dough, which had grown yet again, although not quite as much as it had the first time.


It had, however, turned more into what I had expected consistency-wise. It was a little less slimy and a little more firm. I divided the dough into equal pieces and formed them into loaf shapes in each pan:


Then I left the house, again, so they could rise for three more hours. The recipe said to wait until the dough rose 1/2" above the top of the pan, or about three hours. After about four hours, it still hadn't even come close to the top of the pan, and it appeared as if all growth had stopped:

Now if you're keeping track at home, that's about 21 hours of resting. I got impatient, and decided that was plenty. I put both loaves into the oven, which I had pre-heated to 350 degrees. The recipe said it would bake for 35 to 40 minutes, or until the pan sounded hollow when tapped on the bottom. I gave it a little knock at about the 30 minute mark because the bread looked and smelled like it was about done. It sounded ridiculously hollow for something that was not, in fact, hollow at all. I took these out of the oven:

The next step depends on your intention for the bread. For immediate consumption, you are to let it cool for ten minutes and then slice. If you plan to eat it within a few hours, wrap the bread in foil and set it aside. For anything longer than that, wrap the hot bread in foil and freeze it immediately.

The smell at this point was pretty incredible, so there was no way both of the loaves were going to survive the day. One got set aside to be sliced in the very near future, the other wrapped up in two layers of foil and then put in a plastic bag for freezing. That process took just long enough that I could justify cutting into the bread as soon as I was done.

The bread was delicious, some of the best that I've ever had. It tasted almost like a croissant, which shouldn't be too surprising given the ingredients. The texture was great, and it stayed that way for several days. It was great plain, with some jelly, toasted, toasted with some butter, toasted with some jelly, and drizzled with chocolate for dessert. I'm sure it would have been great other ways, but I ran out after the chocolate part.

This was my first attempt at making bread from scratch, and I have to say I was pretty impressed. Aside from the absurd amount of downtime, it's pretty easy to make. There are a couple of other recipes in the book that make use of it, so I'll get to make it then at a minimum, but I hope to be able to make it a little more often than that. I guess it just depends on how much time I have available to exercise...